Patterns

Tuesday, December 17, 2019

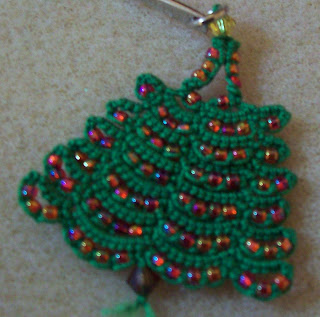
Never Ending Christmas Tree


This pattern came to me a 2 years ago.  I didn't share it because I was trying to be too precise.  This is a loosey goosey style of pattern because once you finish the first row it can be different each time you make it.  I have shared pictures of 2 of the trees I've made.  I'm pretty sure you can make the tree as big as you want.  
Warning: this can be fiddly.

Never Ending Christmas Tree Vicki Clarke 2017

Materials
 Beads
Crochet hook with small tip
Green Thread (I used size 20 Lizbeth #687 in sample)
Shuttle or needle

Terms:
 FR- folded ring
SR- small ring
LR- large ring
lj-  lock join
bp- add bead to picot 
a- first half of the ds
b- 2nd half of the ds
vsp- very small picot

String lots of beads on thread and then fill shuttle.  Cut from ball.

The bulk of this pattern is based of the basic Ankars motif of: 

*SR     5 – 5
LR         5+ (prev ring) 5 – 5 – 5*       

Note: I added 2 beads to the 2nd picot of the large ring then joined the next rows between the beads.  I don’t think these show up so did not include this as part of the pattern.

Start with the tip of the tree:

FR 1    1 vsp  2a  4 2b p 8
*SR     5 – 5
LR       5+ (prev ring) 5 – 5 – 5*
Make * to * 4 times for wide tree
Make * to * 2 times for narrow tree
R         5 – 5
FR       8 +(p of 1st FR) 1 2a 4 2b
Pull up as many beads needed to reach the 2nd picot on the 1st large ring, join to the 1st large ring (this bridges you to the next row)
 *SR     5 – 5
LR         5+ (prev ring) 5 – 5 – 5
Join to the picot of the next large ring in the previous row*
So you will repeat the combo of [SR, LR join] until you have joined to all the 2nd picots of the large ring on the row. 
Finish with a small ring then pull up as many beads on the thread that you need to reach the 2nd picot of the first Large ring of the next row.

I have included pics of the back side of the wide and narrow trees so you can get an idea of how many repeats I did.
I did not always join between sets of SR, LR and the wider the tree gets the more likely you will have a few repeats before joining to the previous row.
This is a loosey goosey pattern that can go on forever….

Front of trees.  

Back of trees so you can see how many big rings I used for each row.  


Friday, December 13, 2019

Gnome For Christmas

I am in love with the Crochet and Knitted Gnomes I've seen around.  So I decided we need one for tatting too.  Your job is to let me know if there are any mistakes.  


Gnome For Christmas
Vicki Clarke 2019


Materials:

Hat Red or Blue thread
Beard thread
Nose thread
Needle or shuttle
Crochet hook

Terms:

vsp very small picot
R- ring
C- chain
SCMR- self closing mock ring
lj- lock join

Hat 

Center
R1        6 vsp 6 vsp 6 vsp 6

Round 1
C1        4 vsp 4 lj (1st vsp of R1)
C2       4 vsp 4 vsp 4 lj (2nd vsp of R1)
C3       4 vsp 4 lj (3rd vsp of R1)
C4       4 vsp 4 lj (beginning of round)

Round 2

C5       4 lj (vsp of C1) 4 p 4 lj (vsp of C1) 4 (lj of C1)
C6       4 lj (1st vsp of C2) 4
SMCR 1          4 p 4
C7       4 lj (2nd vsp of C2) 4 lj (lj C2)
C8       4 lj (vsp of C3) 4 p 4 lj (vsp of C3) 4 join to lj of C3, cut and hide ends

Beard

Choose a beard color, you will also need the nose thread for this part
Wind on 1 yard of beard thread onto shuttle CTM with ball

R         4 + (last lock join of Hat) 4
C9       4 vsp 4 vsp 4
For the nose: change to a shuttle with nose colored thread. 
R         6 +(vsp on C4) 6 vsp 6
Before closing the ring pass the beard shuttle through the ring, this helps to hold the ring in place and you can hide the ends of the nose in the next chain.
Cut the nose thread so you can hide the ends, you no longer need the nose thread
Using the beard shuttle:
C10     4 vsp 4 vsp 4 lj(vsp on nose)
C11     4 vsp 4 vsp 4
R         4 + (1st lock join of Hat) 4 tw slt
C12     8 lj (vsp C11) 4
SCMR                        4
C13     4 lj (next vsp C11) 6
SCMR                        4
C14     6 lj (vsp C10) 8
SCMR                        4
C15     8 lj (next vsp C10) 6
SCMR                        4
C16     6 lj (vsp C9) 4
SCMR                        4
C17     4 lj (next vsp C9) 8
join to beginning of beard, hide ends


Friday, December 6, 2019

Holly Jolly Christmas Tree

I realised that I have lost the Holly Jolly Christmas Tree pattern from this blog.  I suspect it didn't get changed over when I made a separate page for my patterns.  So given that its the time of year that everyone is thinking of Christmas Trees, I have added it back to the page.  The link is also below:
Holly Jolly Christmas Tree

Saturday, November 16, 2019

Tall Christmas Tree Pattern

Christmas is fast approaching and if you are giving tatted gifts you are probably already frantically tatting.  This Christmas Tree pattern came to me the other day and made me think of cartoon style Christmas Trees.  The Pattern is diagrammed below.  The dark circles are 3mm crystal beads, you add them to the tatting by pulling a loop through the bead and then holding with a paperclip.  Then you tat 6 ds and make a lock join to the space held by the paperclip.  Think of this as a beaded mock ring- the bead takes up half the ring.  I put a double stitch between each of the beaded mock rings.  Most the the outside rings are mock rings too with the exception of the first ring.  On the large tree I used a split chain on the one side so I didn't have to cut and tie.  You can do it either way.   
Don't forget this pattern because a quick change in color and in the trunk can make these trees into umbrella's for spring!


Monday, October 21, 2019

Boo-yah ghost

I thought I was so smart figuring out tatting a circle around the cluny but then I saw it on Instagram lol.  Not as smart as I thought I was...

Boo-yah Ghost

All clunies are 12 passes.

Clunny (1)
Chain 14, lock join to beginning of cluny
Chain 14, lock join to end of cluny
Cluny (2)
Chain 14, alligator join between clunies
Chain 14, lock join to end of clunny 2
(Note that if you want a smooth ring do a Catherine Wheel join instead of lock, I found it didn't make a difference)
Chain 24
Clunny (3)
Chain 4
SCMR 4
Chain 4
Clunny (4)
Chain 24, lock join above outside lock join on eye
Chain 8
SCMR 2 p 1 p 1 p 1 p 1 p 2
Chain 8, lock join same as previous lock join
Chain 20
SCMR 2 p 2
Chain 20, lock join to eye
Chain 8
SCMR 2 p 1 p 1 p 1 p 1 p 2
Chain 8, join to beginning
and hide ends

Sunday, October 20, 2019

Pumpkin Purse Charm!

So my hands are sore ftom tatting with Lizbeth metallic.  (Love it....we just need black...)  So to give them a rest I decided to make clunnies lol.  At least it gave my hand a chance to cramp in a different position!   The result are a couple Halloweenish motifs.  The first is the pumpkin purse charm...


Pumpkin Purse Charm

Note all clunnies are 12 passes.

Start with a cluny (1)
Chain 10
Cluny (2), lock join to start of 1st cluny
Chain 4
Clunny (3), lock join to start of 2nd cluny
Chain 10
Cluny (4), lock join to start of 3rd cluny
Chain 4
Cluny (5), lock join to start of 4th cluny
Chain 10
Cluny (6), lock join to start of 5th cluny
Chain 6, lock join to above space where the 3rd and 4th cluny join
Chain 6, lock join to start of cluny 1
Switch colors to green, turn work
Chain 10, lock join above middle clunies
Chain 10, lock join to end of cluny 6,
Slt, turn work
Chain 12, lock join above 3rd and 4th cluny,
Chain 12, lock join same place
Chain 12, join and tie off at cluny 1


Saturday, October 19, 2019

A little twisted...

The famous twisted nature of the Lizbeth metallic thread has struck again!  I usually keep this ball in this pod like bag but not when tatting from it, so I have a little tangle.

Tuesday, October 15, 2019

Every Witch Way

I started the Every Witch Way pattern by Barbara Benson.  Its very addictive...

Thursday, September 19, 2019

I wish I were at the Fringe Element Tatdays 2019

I'm not able to go to the Fringe Element Tatdays this year but I am still able to be there in heart. I invite you to do the same with this pattern called Ballroom Blitz

Its called that because it kinda looks like the anarchy sign a bit and I had an image of the rebellious tatters rioting through the hotel with shuttle and needles in hand to get to the vending tables lol. Also the weekend is a riot of tatting!


Ballroom Blitz Heart
Vicki Clarke 2019

R- ring
C- chain
SCMR- self closing mock ring
vsp- very small picot
lj- lock join
p- picot
AJ- alligator join, put the ball thread behind area indicated and the shuttle (needle) thread in front then continue tatting

Center:           R         3 vsp 6 vsp 6 vsp 6 vsp 3

Round 1
C                     3 lj (1st vsp) 5
SCMR                        4 p 4
C                     5 lj (2nd vsp) 5
SCMR                        4 p 4
C                     5 lj (3rd vsp) 5
SCMR                        4 p 4
C                     5 lj (4th vsp) 3 lj (beginning)

Round 2

C         16 AJ (base of 1st SCMR) 12 AJ (base of 2nd SCMR) 12 AJ (base of 3rd SCMR) 16 join to beginning.  Add tail of 20 lock stitches and tassel

Thursday, September 5, 2019

I wish I was at Palmetto Tat Days, aka The Honey Comb Charm

It's here! Palmetto Tat Days 2019 starts today!  
Every year I send a kit and pattern down for the grab bags they give to each lucky attendee.  This year I found these awesome hexagon shaped woodies that made me think of Mary Kay Ash's quote about the Bumble Bee and its unlikely flight.  I think it goes well with the theme of Tatting Tale Tails.  
The pattern is posted below so those of us who aren't attending can still share in the fun.  PLUS I was too lazy to print off the pattern and fold it up into the kits so everyone getting the kit is being directed here.  So we can all share in the fun.  An ice drop gem fits perfectly into the pattern to replace the hexagon shaped woody.  So no need to search all over for the woody.  The link to download the pattern is below and I will add it to the Ice Drop Addicts group on Facebook so you have a couple places to pick up the pattern. http://www.keepandshare.com/doc/view.php?id=8241917&da=y
Honey Comb Charm
Victats@gmail.com 2019

I wish I was at Palmetto’s 2019….
Each motif needs 1.5 yards on shuttle and 1 yard for ball thread
1st Motif
R1       3 - 3- 3
R2       3 - 3 – 3
C1       3 – 3 – 3
*R       3 + (p on prev ring) 3- 3
R         3 - 3 – 3*
C         3 + (p on prev chain) 3 – 3*
Repeat from * to * around motif 
On the last picot, join to the first picot on the first chain.
Cut and hide ends

2nd Motif
R1       3 – 3 + (picot R1 on 1st motif) 3
R2       3 - 3 + (picot R2 on 1st motif) 3
C1       3 – 3 – 3
 *R       3 + (p on prev ring) 3 + (picot R3 on 1st motif) 3
R         3 + (1st picot R4 on 1st motif) 3 - 3
C         3 + (p on prev chain) 3 – 3*

Repeat from * to * around, each time matching the joins to the next set of rings.
Before joining the last rings slip in hexagon
On the last picot join to the first picot on the first chain.
End the round joining back to C1 on 2nd motif

Then:
Chain 30- 40 double stitches to create a hanger or loop to attach to something.  Then join to C1 on the first motif.  Hide ends

Then:
Make a tassel through the picot on the bottom.


Wednesday, August 28, 2019

A new sight

I've visisted the Jo-Ann's Fabrics  in Ogdensburg, NY for several years and have never found anything to do with tatting.  I realise that some stores do have tatting supplies but never this one.  So it was a surprise that when I did my every visit check for the status of tatting that I actually found shuttles.

Thursday, July 4, 2019

Happy 4th of July!!!

Wishing all of you a Happy 4th of July weekend!!!!


Terms
R- ring
C- chain
+ join
sp- small picot
SCMR- self closing mock ring. See http://www.janeeborall.freeservers.com/SCMR.pdf for instructions

Day 3

Round 1
*R       3 +( above 1st lj of rocket) 3
C         10
SCMR                        3
C         10
R         3 +( above 2nd  lj of rocket) 3
C         10*
Tat from * to *, each time moving to a different rocket.

Round 2
*R       3 +(space above ring) 3
C         12
SCMR                        3
C         12
R         3 +(space above next ring) 3
C         12*
Tat from * to *, each time moving to a different rocket.


Wednesday, July 3, 2019

4th of JulyTat-a-long Day 2


 There might be a few ends to today's portion but I believe you can overcome any ends phobias.  
  Muahahaha!

4th of July Tat-a-long 2019
Rockets Red
Vicki Clarke 2019 Victats@gmail.com

Terms
R- ring
C- chain
sp- small picot
+ join
SCMR- self closing mock ring. See http://www.janeeborall.freeservers.com/SCMR.pdf for instructions

Day 2

24 inches red thread on shuttle CTM with ball
R         4 sp 4 sp 4 vsp 4
C         4 lj (1st sp) 3
SCMR                        2
C         3 lj (2nd sp) 4 lj (3rd sp) 18
Cut ends leaving a long enough tail to hide ends.  Pass the Chain up through one ring and down through the next ring.  Tie to beginning and hide ends.  Make 5 rockets, making sure that they all go through the rings in the same direction.
See you tomorrow!

Monday, July 1, 2019

A Very Canadian Tat-a-Long Day 3

Happy Canada Day
I was tempted this morning to do the whole post in red. I stiffled the urge since I didn't think you would be able to read the pattern.  We are so used to black.

Don't forget that tomorrow the 4th of July Tat-a-long will start.  I will likely be posting later in the day since I'm back to work tomorrow.  You will need red, white and blue thread. 

Cheers

Materials

white thread
2 shuttles or one needle
crochet hook

Terms
C- chain
R- ring
SR- split ring
vsp- very small picot
lj- lock join.  Make a lock join by using a crochet hook to pull shuttle thread through the joining space.  This creates a loop and you pass the shuttle through the loop then tighten to remove excess thread.  In these patterns a lock join is often joined to the space between chains.  Where to do the lj is indicated in brackets.  For example lj (C2 & 3) means a lj in the space between the 2nd and 3rd chain.
rw- reverse work; turn the tatting towards you to change the direction the chain is facing
LSC- lock stitch chain,
SCMR- self closing mock ring.  See http://www.janeeborall.freeservers.com/SCMR.pdf for instructions.
slt- shoe lace trick

Day 3

Wind 2 shuttles CTM with white thread 

*R       5 +(7th picot on maple leaf) 5
R         5 +(1st picot on next maple leaf) 5
C         10
SR       5/6
SR       5/6
SR       5/6
C         4
R         10+(2nd picot on Maple leaf) 10
C         10
SCMR                        3 p 3
C         10
R         10+(2nd picot on Maple leaf) 10
C         14
R         10+(3rd picot on Maple leaf) 10
C         10
SCMR                        5 p 5
C         10
R         10+(5th picot on Maple leaf) 10
C         14
R         10+(6th  picot on Maple leaf) 10
C         10
SCMR                        3 p 3
C         10
R         10+(6th  picot on Maple leaf) 10
C         4
SR       5/6
SR       5/6
SR       5/6
C         10*

Repeat from * to * around maple leaves.

Sunday, June 30, 2019

A Very Canadian Tat-a-Long Day 2

Day 2 is a little bit longer with a couple twists and turns.  If you would like to keep things short and simple then when done tatting Day 2 add a tassel to the final ring.  However, if you would like to make something a little bit bigger then make 3.


The spot of dirt on the right didn't
show up until now.  Please ignore it lol!

Terms
C- chain
R- ring
vsp- very small picot
lj- lock join.  Make a lock join by using a crochet hook to pull shuttle thread through the joining space.  This creates a loop and you pass the shuttle through the loop then tighten to remove excess thread.  In these patterns a lock join is often joined to the space between chains.  Where to do the lj is indicated in brackets.  For example lj (C2 & 3) means a lj in the space between the 2nd and 3rd chain.
rw- reverse work; turn the tatting towards you to change the direction the chain is facing
SCMR- self closing mock ring.  See http://www.janeeborall.freeservers.com/SCMR.pdf for instructions.
slt- shoe lace trick

Day 2

R         5 vsp 5 vsp 5
LSC    4
SR       6/6 ***before closing this ring slip the center motif through the ring so the chains are caught in the ring.***
C         vsp 10 lj (closest vsp of motif 1) 3
SCMR                        1 p 1
C         3 lj (next vsp) tw slt 10 +(vsp next ring)  4
R         1 p 1
C         4 +(next vsp same ring)  10 +( vsp top ring) 4
R         1 p 1
C         3
R         3 p 3
C         3
R         1 p 1
C         4 +(next vsp top ring) 10 +(vsp next ring) 4
R         1 p 1
C         4 +(next vsp) 10 +(vsp next ring) tw slt 3
SCMR                        1 p 1
C         3 lj(next vsp)  10 lj(vsp 1st C)
LSC    10
R         6 p 6  ***I did this as a single shuttle split ring and hid the ends as I made it. ***

***If you are making the larger project then on the 2nd and 3rd motif the final ring with be:
R         6 +(1st motif) 6


Saturday, June 29, 2019

A Very Canadian Tat-a-long 2019 DAY 1

Once again to celebrate the days leading up to Canada Day I have developed a theme related pattern,  This year it will last 3 days but if you are not interested in a longer project then a simple motif is made by Day 2.  No surprise that if you are going with theme the thread is red and white.  No surprise that you could choose to do leafy colors if you aren't interested in a Canada Day related project.

Just a warning that the diagrams have been made to compliment the written instructions. 
This year I won't upload to keep and share until after the tat-a-long ends but will put the instructions here on my blog and on facebook.

A Very Canadian Tat-a-long 2019
Boxy Maple Leaf
Vicki Clarke 2019 victats@gmail.com

Terms
C- chain
R- ring
vsp- very small picot
+ join

Materials
 Red and white thread
Shuttle or needle
Crochet hook

Day 1

Center Motif part 1
Wind 24 inches of Red thread on shuttle CTM with ball
R         5 vsp 5 vsp 5
C         10 vsp 10
R         5 vsp 5 vsp 5
Hide ends.

Center Motif  part 2


Wind 24 inches of Red thread on shuttle CTM with ball
R         5 vsp 5 vsp 5
C         10 +(join to vsp on C of 1st motif) 10
R         5 vsp 5 vsp 5
Hide ends (I made the last ring of each part a single shuttle split ring and hid then chain end on the non loop side.  You can find a tutorial for a single shuttle split ring here: https://www.youtube.com/watch?v=gnlJBw4lCG4

See you Tomorrow!

If you are super ambitious make 3 sets of the center motif, if time is limited then just make 1.


Thursday, June 13, 2019

Evil plans for the end of June

Hi everyone, hope you are enjoying the non-snow days.  Its been such a crazy weather situation that we need to just be happy its not snowing and occasionally the sun visits us lol.

June seems to be one of those months that just slip by and all of a sudden its July 1st!  The good news is that I seem to be ahead of things for once.  I've been able to bring a pattern to fruition in time to tell you that there will be another "Very Canadian Tat-a-long" this year leading up to Canada Day.  The extra good news is that it will be once again followed by a "4th of July" pattern.   This seems too good to be true and it kinda is....I'm not sure how intense the patterns will be.  You see I haven't entirely completed the entire image that lies in my head but at the very least you will  get a chance to enjoy theme related motifs in red, white and later blue.  I also can't find my white thread so that may cause a deviation in the evil plan.

In other good news I'm almost ready to create the kits that I send down to Palmetto's every year for their TatDays.  The idea came to me very early in the year so I have everything needed.  I just need a few days to measure out thread.  The kit will involve a theme related pattern or at least something I can tie back to the theme. 

I've included a picture belowe of a previous kit that I sent down in conjunction with Georgia Seitz a few years ago.  Georgia donated the teapot charms and I designed a teapot or teacup dangle.  The picture below is from my Mom's house where she choose to use them as decorations on her teabag jar. 

Sunday, April 14, 2019

blogger app has decided it won't work!

I have made a few posts that just won't publish.  So I've ditched the app for now. 
I'm pushing hard to finish my 2016 Renuleks Spring Napkin.  If its finished I won't feel bad starting the 2019 Spring Napkin.  To tell the truth I've done 2 rounds on the 2019 but I'm on the fence anout the colors.  I may decide to do it in a different color combo.
2016 is almost done!

Wednesday, March 6, 2019

Gird your loins!

Get ready the Spring Napkin 2019 is here!  Renata warns that this time it may last into the summer.  A new round will be posted at her blog every Thursday but you can also purchase the whole pattern with more details on Etsy.  Sounds like big fun.
Thank you Renata for bringing this to tatting again this year!
P.s. still working on 2016....