Patterns

Wednesday, October 6, 2021

Stumpy Corn Cob

A few years ago I was tatting a lot of the Stumpy bookmark by Kersti Anear. This is a classic pattern and strangely enough it was the first time I tatted it. I used Kerry Solomon's Hand dyed and thread the combo of the thread with pattern reminded me of a corn cob. I started to fiddle around to see if I could add a husk to the pattern to make it look more like a corn cob. I think I was sucessful. It sat for awhile and finally in August I asked Kersti If it was ok to share the addition to the pattern. Kersti immediately said yes. Its taken me a couple of months fiddling around but I finally have a usable pattern. There is no advanced techniques in this project other than a slt and do not reverse work. (other versions were more complicated)
A big Thank You to Kersti Anear for allowing me to share the addition.
 
To make this pattern you need to tat the Stumpy Bookmark by Kersti Anear but change Ring B to : 5 p 7 p 7 p 5 The pattern can be found here: http://www.kersti.com/2021/01/28/stumpy-tatted-bookmark-pattern/ 
 
Terms: R- ring, C- chain, tw-turn work, slt- shoe lace trick, + - join, p- picot, lj- lock join 
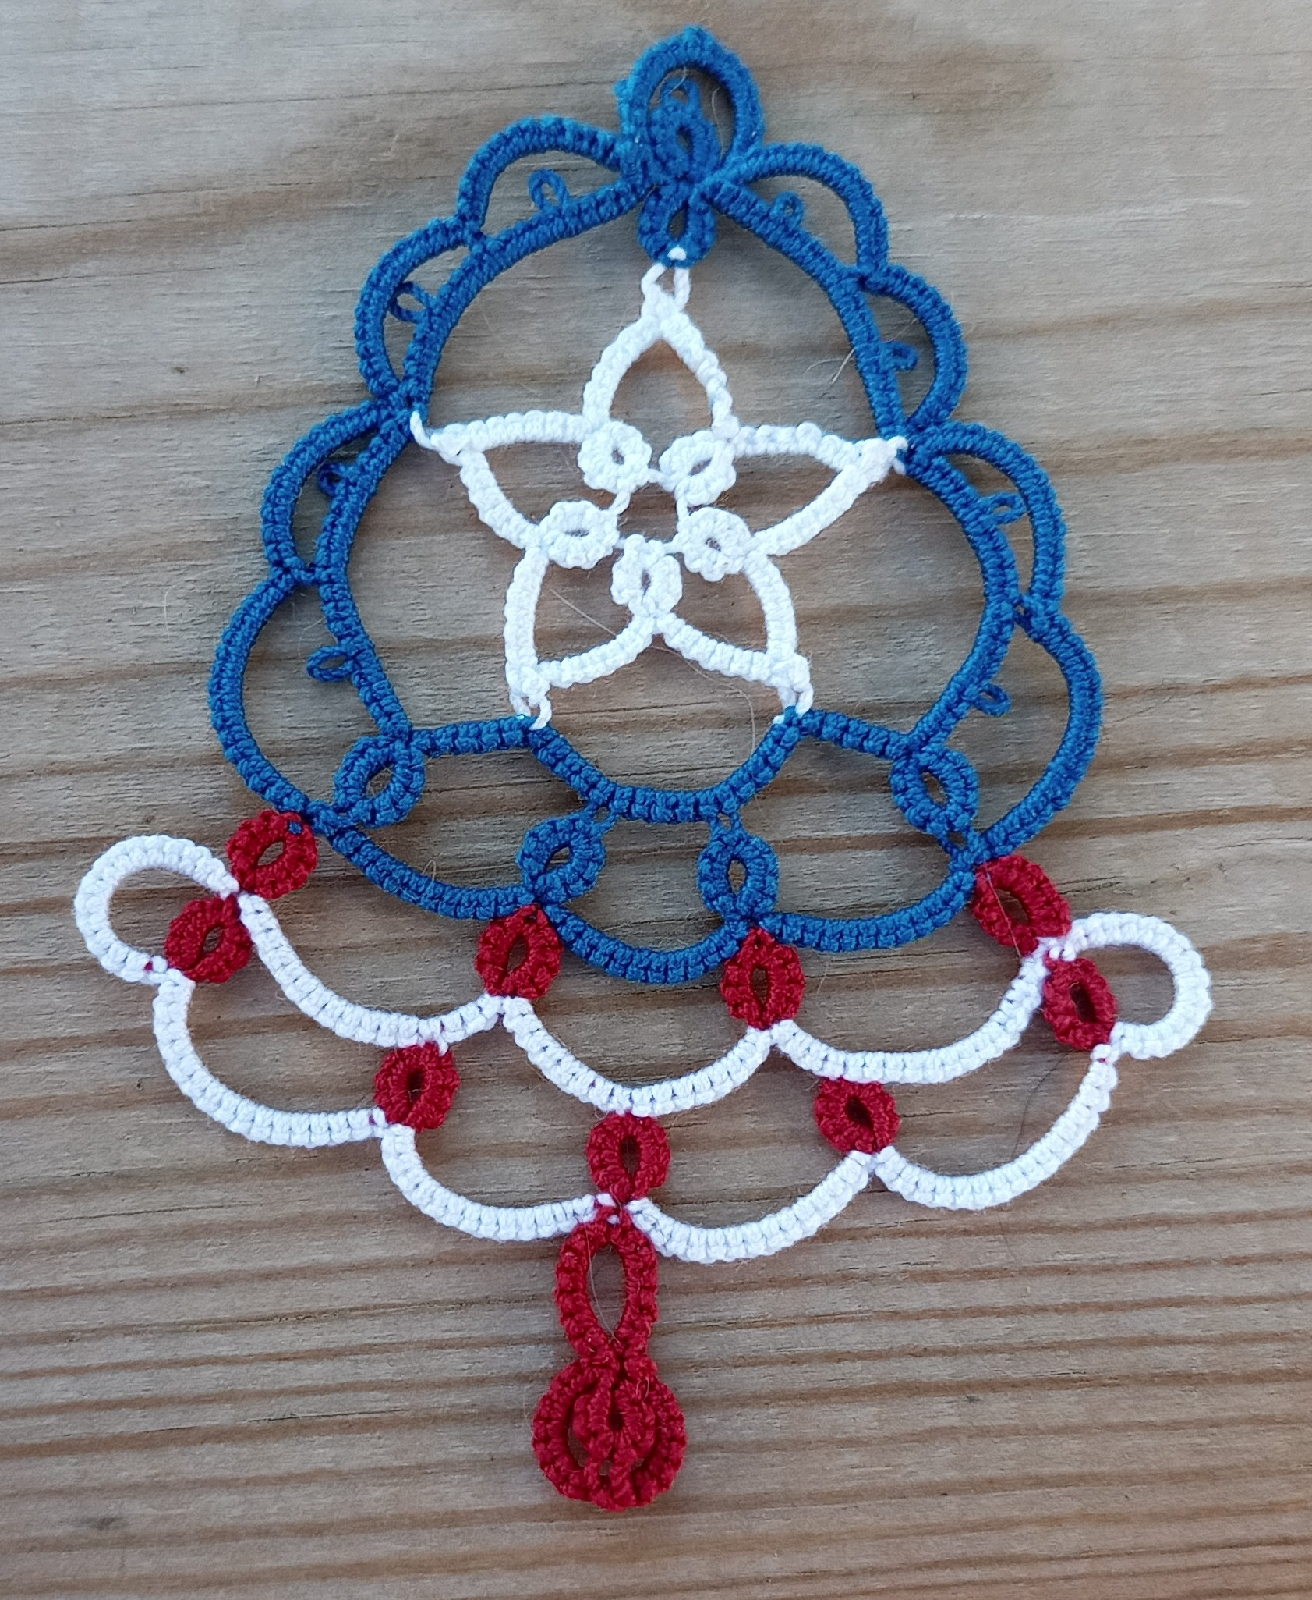
Corn Husk Addition 
Shuttle- 2.5 yards on shuttle, needles: normal tail 
R1 1 p 1 
C 14 
R2 4 + (p between rings on middle trefoil) 4 
C 12 
R3 4 + (p between next ring and end trefoil) 4 C 12 
R4 4 + (p between large and small ring on end trefoil) 4 
C 12 
R5 4 + (p on large ring) 4 
C 12 
R6 4 + (p between large and small ring on end trefoil) 4 
C 12
R7 4 + (p between next ring and end trefoil) 4 C 12 
R8 4 + (p between rings on middle trefoil) 4 
C 14 slt tw 
R9 1 p 1 Do not reverse work 
C slt 15 
R10 4 + (above previous ring) 4 
C 10 
R11  4 + (above next ring) 4 
C 12 
R12  4 + (above next ring) 4 
C  16 
R13  4 + (above next ring) 4 
C  12 
R14  4 p 4 
C  6 p 6 lj (p on previous ring) 12 
R15  4 + (same as R13) 4 
C  16 
R16  4 + (above next ring) 4 
C  12 
R17  4 + (above next ring) 4 
C  10 
R18  4 +(above next ring) 4 
C  15 Join to beginning

Thursday, September 30, 2021

Orange Shirt Day 2021/ National Day for Truth and Reconciliation

Hi everyone, it's Orange Shirt Day in Canada.  I've added a link so you can learn about why Orange shirts, Residential Schools and what they represent.   In the summer I posted a pattern to highlight the Orange Shirt and the living history it represents.  This is the link to the pattern Every Child Matters .  I invite you to spend a few moments educating yourself about the Residential Schools and the consequences for the survivors and descendants.
The recommendations from the Truth and Reconciliation Commission are here

A national Indian Residential School Crisis Line has been set up to provide support for residential school survivors and others affected. People can access emotional and crisis referral services by calling the 24-hour national crisis line: 1-866-925-4419.

Thursday, August 26, 2021

I wish I was at Palmetto tatdays 2021!

This weekend is the Palmetto Tatdays and I'm stuck at home.  If you don't know what Tatdays to are then go check out the Palmetto tatting Guild's website.  All is explained there.  Basically Tatters congregate from all over to take classes, tat and talk tatting.  There are amazing teachers and vendors.  Lots of fun is had.  
Every year I send a pattern and kit down for the welcome bags.  I also share the same pattern here so that those of use that are missing out can feel the excitement of tatting something new.  This year's pattern is the Winding Road Motif.  Believe it or not it starts at the small ring at the bottom of the picture and winds around finally ending where it began.  I hope to have a tutorial this weekend available on YouTube.

Winding Roads Motif, Vicki Clarke 2021

Materials: 4 9mm buttons shuttle or needle 5 yards thread 
  Round 1 
 Wind 2 yards on shuttle do not cut from ball, needle tatters regular tail
 R 4 p 4 
 C 8 lj (to button 1) 
 C 8 p 8 lj (to button 2) 
 C 8 p 8 
 R 4 p 4 
 C 8 + (previous p on chain) 8 lj (to button 3) C 8 p 8 lj (to button 4)
 Move chain so that it wraps around the opposite chain 
 C 8 + (base of 1st ring) 

  Round 2

After the last join on round 1 the line of tatting will curve around so you are tatting around the outside in the direction of the last button added 
 C 12 lj (next hole on button 4) 12 lj (skip a hole, join to next hole) 
 C 6 lj (hole on button 3) 12 lj (skip a hole, join to next hole) 
 C 12 AJ (around where the 2 chains between button 2 and 3 are joined) 
 C 12 lj (hole on button 2)12 lj (skip a hole, join to next hole) 
 C 6 lj (hole on button 1) 12 lj (skip a hole, join to next hole) 
C 12 join to beginning ring. Cut ends, hide thread

Sunday, August 22, 2021

this weekend....

The Palmetto tatdays starts on Thursday this week.  As usual I sent down a pattern and kit for the welcome bags   I will post the pattern Thursday-ish but a picture of the motif is below.  To tat this you will need 9mm buttons and size 20 Lizbeth thread.  The kit comes with the 9 mm buttons but I left the thread color up to the individual.  Please join me this weekend in tatting the pattern as part of the Annual "I wish I was at Palmetto tatdays" weekend.  I encourage you to check out the Palmetto tatting Guild to find out more of what will be going on this weekend.

Friday, August 13, 2021

#thegreatflossdroptrade

I follow a lot of you tube vlogs.  Some of them are by Cross Stitchers (they like to call it floss-tube).   I do cross stitch but mostly on perforated paper because it's easy to finish.   Many cross stitchers use something called floss drops.  Basically it's something we to hold the thread so it doesn't tangle, plus it looks pretty.
The floss-tuber Michelle on "Momma loves you GB" figured out you can use business cards to make floss drops.  Basically you punch a small hole in the top and a large hole in the bottom. (I haven't done that yet in the picture).  She suggested doing a trade and  called it #thegreatflossdroptrade on Instagram.  I decided I must join in so I ordered cards with a favorite picture.  I wish I had placed the picture slightly lower but it's otherwise perfect.   
The idea is you send 12 cards punched with the holes and one with your name and contact.  
However, I'm mostly a Tatter so you know what that means...bling it up!

I used a pin to make 4 holes in the bottom of the card and did some quick tatting.  I've used the beads to hide the ends. This will be my signature card!

I believe the cards would also be awesome as thread holders for tatting!

Monday, August 2, 2021

beautiful day

It's been a beautiful Monday here at my cottage.  I spent the day tatting and cross stitching (poorly).  Deana Mackenzie shared these emoji beads with me 2 years ago and I found the perfect thread to go with them.  I figure they will make cute scissor dangles.
I also finished a cross stitch Russian Doll ornament from the Gift Of Stitching Magazine.  I chose to make it on perforated paper instead of the called for cloth.  Unfortunately the finishing instructions for the face kinda make her look a little tawdry.  Or maybe she has false eyelashes....

Saturday, July 3, 2021

Fourth of July Tat-a-long Day 2

My apologies for the way this is being posted.  I can't seem to have the spacing turn out right.  I will add it as a complete download at the end of the tat-a-long.


Wednesday, June 30, 2021

Every Child Matters Day 2

I'm sorry the formatting of is weird but I can't seem to fix it. Materials Size 20 Orange Lizbeth Thread Needle or shuttle Continued from Day 1 C rw slt 8 tw slt 8 R 3 + (1st vsp on Round 1) 3 C 12 R 4 vsp 4 C 8 MR 2 C 6 MR 2 C 5 lj (vsp on R) 6 lj (2nd vsp on Round 1) 16 MR 2 C 4 R 4 + (3rd vsp on Round 1) 4 C 8 R 6 + (above next lj on Round 1) 6 C 8 R 4 + (4th vsp on Round 1) 4 C 4 MR 2 C 16 lj (5th vsp on Round 1) 6 R 4 vsp 4 C 5 MR 2 C 6 MR 2 C 8 lj (vsp on last R) 12 R 3 + (6th vsp on Round 1) 3 C 8 slt tw 8, join to beginning

Tuesday, June 29, 2021

Every Child Matters Day 1

Every Child Matters Day 1 
Vickii Clarke 2021 
Materialss: 
Size 20 Orange Lizbeth Thread

Terms are on yesterday's post
Shuttle tatters: 3 yards on shuttle, CTM with ball
Needle Tatters: regular tail 
R 8 vsp 8 vsp 8 vsp 8 
C 8 vsp 4 vsp 4 lj (1st vsp) 8 vsp 8 lj (next vsp) 8 vsp 8 lj (next vsp) 4 vsp 4 vsp 8 lj (to beginning)
 Do not cut ends See you tomorrow!

Thee pattern this year is aimed at highlighting Orange Shirt Day (September 30th). This is a day when we honour the Indigenous children who were sent away to residential schools in Canada and learn more about the history of those schools.

Monday, June 28, 2021

Every Child Matters

This year the Very Canadian Tat-a-long be done a day early. The last 2 months Canada has been grappling with the discovery of mass graves of First Nation Children at Indian Residential Schools. The number has increased over the month of June and is now in the 1000s. In light of these discoveries I will be posting June 29 and June 30 but will not post a pattern on July 1/2021, Canada Day. The pattern this year is aimed at highlighting Orange Shirt Day (September 30th). This is a day when we honour the Indigenous children who were sent away to residential schools in Canada and learn more about the history of those schools. The thread used in the pattern is size 20 Lizbeth Thread. Terms
C- Chain R- Ring Cl rw- close ring, reverse work Cl dnrw- close ring, do not reverse work vsp- very small picot lp- large picot (around 1 inch) lj- lock join. Make a lock join by using a crochet hook to pull shuttle thread through the joining space. This creates a loop and you pass the shuttle through the loop then tighten to remove excess thread. In these patterns a lock join is often joined to the space between chains. Where to do the lj is indicated in brackets. For example lj (C2 & 3) means a lj in the space between the 2nd and 3rd chain. rw- reverse work; turn the tatting towards you to change the direction the chain is facing SCMR- self closing mock ring. See http://www.janeeborall.freeservers.com/SCMR.pdf for instructions. slt- shoe lace trick SR- split ring

Monday, June 14, 2021

Rainbow Heart for Pride

 Happy Pride

For those that don't know Pride season has started.  Last year I shared this pattern on several Facebook groups but I just realised I didn't share it here.  Enjoy!

Rainbow Heart for Pride

Friday, April 16, 2021

Lucky Squares Update

I'm still tatting the Lucky Squares.  I've made 6 but now working on tatting a border of Shamrocks.  I'm slightly under 1/2 way but I like the way it looks so far.

Thursday, April 1, 2021

Happy International Tatting Day!

I was amazed to find multiple references coming up when you googled International Tatting Day.   In the past it only came up on tatting related sites but it's actually found on some of the calendar sites.  Although no site mentioned the necessity of eating chocolate as part of the ritual celebrations there was some that explained tatting.   No tattoo related sites showed up.  

Monday, March 15, 2021

Lucky Squares

There's only a few more days until St Patrick's Day but I have at least one more pattern to share.   For this project I broke out a second shuttle to make the floating rings.   I prefer to work shuttle and ball but needs must.  For needle tatters I suggest that you use Bonnie Swank's needle tatting technique for the floating rings.  Beware that the sides are not all the same and you need to pay attention when joining the 2 squares together.  Otherwise you'll end up like me pulling out an entire side.  

Lucky Squares by Vicki Clarke. 2021

Materials:

Gold thread (not metallic)
Green thread (Shamrocks)
2 shuttles or 2 tatting needles

See the pattern for Lucky Pair for the shamrock instructions.   When making the 2nd set you will join to the 1st set of Shamrocks at the picot next to where you join the shamrocks on the 1st set.  (If this is confusing see the picture).

You need 5 yards on the 2nd shuttle and 4 on the first shuttle.
Needle tatters normal tail, but where I say 2nd shuttle is where you can use Bonnie's technique.


*R. 4 +(p on small ring) 4
C. 4 p 4
R  4 +(same p) 4
C 6 p 6
R 4 +( skip one p on shamrock and join to the next one) 4
C. 8
2nd shuttle R 4 p 4 p 4 p 4
1st shuttle C 4
2nd shuttle R 6 +(last p of prev ring) 4 p 4 p 6
1st shuttle C 4
2nd shuttle R 4 +(last p of prev ring) 4 p 4 p 4
1st shuttle C 8
R. 4 +(next p on shamrock) 4
C 6 p 6
R4 +(next p on shamrock) 4 +(p on next shamrock) 4
C 6 p 6
R 4 +(next p on shamrock) 4
C. 8
2nd shuttle R 4 p 4 p 4 p 4
1st shuttle C 4
2nd shuttle R 6 +(last p of prev ring) 4 p 4 p 6
1st shuttle C 4
2nd shuttle R 4 +(last p of prev ring) 4 p 4 p 4
1st shuttle C 8
R 4 +(next pon shamrock) 4
C 6 p 6*
Start tatting from * to * to finish 2nd half.

Please note that I made the same mistake on both Squares.  There are a few sections where I tatted 4 p 4 p 4 instead of 6 p 6.  It's the same stitch count but and extra picot. The 2nd square will join to the 1st square at the 2nd picot on the smaller outside rings.  See the pic if this is confusing.

Cheers

Thursday, March 11, 2021

Lucky Love Heart

I've been on a streak of shamrock tatting lately.  This new pattern seemed like an obvious next step.

Lucky Love Heart by Vicki Clarke 2021

Black thread
Gold thread
Green thread
Same terms as yesterday


Start by tatting the Lucky Pair pattern from my previous post.  Hide ends.

Wind 2 yards of black thread on shuttle.
Needle tatters normal tail

R. 4 +(left p on 2nd leaf on R shamrock) 4
C. 5 p 5 p 5
R  4 +(next p on 2nd leaf on R shamrock) 4
C  5 p 5 p 5 p 5
R. 4 +(between chains on 3rd leaf on R shamrock) 4
C. 5 p 5 p 5 p 5
R. 6 p 2
R  2 +(previous p) 6 +(p on small ring between shamrocks) 6 p 
R  2 +(previous picot)
Mock Ring. 8 p 1  large picot 1 p 8
C. 5 p 5 p 5 p 5
R 4 +(between chains on 1st leaf on left shamrock) 4
C. 5 p 5 p 5 p 5
R  4 +(1st p on middle leaf on left shamrock) 4
C  5 p 5 p 5
R. 4 +(2nd p on middle leaf on left shamrock) 4. 
Hide ends

Change to gold thread

Wind 2 yards gold thread on shuttle
Needle tatters normal tail

C +(same picot as last join) 4
R. 4 +(between 2nd and 3rd leaf) 4
C. 4 p 4 lj(next p) 4 p 4 lj(2nd p on 1st leaf) 4 p 4
R. 4 +(between 1st and 2nd leaf on shamrock) 4
C. 4 lj (p on 2nd leaf) the
C. 4 p 4
R  4 +(above last ring) 4
C  4 p 4 p 4
R 4 +(p on next chain) 4 
C 4 p 4 lj (next p) 4 p 4
R. 4 +(next p) 4
C. 4 p 4 p 4
R. 4 +(above next R) 4
C 4 p 4, join to beginning
Cut and hide ends.


Monday, March 8, 2021

Lucky Pair Shamrock

Lucky Pair Shamrock
Vicki Clarke 2021

Terms:
R ring
C chain
lj lock join
vsp very small picot
p picot

Start by winding 2 yards on shuttle, do not cut ball thread.
Needle tatters normal tail
Model was done in size 20 Lizbeth thread

R  2 vsp 3 vsp 3 vsp 3 vsp 3 vsp 2
*C  6 p 4
R  4 +(p) 4
C  4 p 6 lj (vsp)*
Repeat from * to * ending the last chain at the base of the big ring.

Lock stitch chain 6

R 3 p 3

Lock stitch chain 6

R 2 vsp 3 vsp 3 vsp 3 vsp 3 vsp 2
C 6 p 4
R 4 +(p) 4
C 4 p 6 lj (vsp)
*C 6 p 4
R 4 p 4
C 4 p 6 lj (vsp)*
Repeat from * to * ending the last chain at the base of the big ring.
Cut and hide ends

Check in later this week for a 2nd pattern using these Shamrocks.

Cross stitch design for pillow in background is by Punker n punkin quilting.

Tuesday, January 26, 2021

Cardinal finished


I tatted this Cardinal a few weeks ago.  I've been debating how I will do the colors for its mate.  I'm thinking that I will use a caramel color and either add the red tinges to the wings afterwards with a marker or run a filament of red through the stitches.  I'm not sure.  The pattern is by Miranda Rensbergerand shared on her blog Tatting Fool.  The pattern is very fun and I have been planning on tatting it for the last year.  The goal is to put the Cardinals in a picture frame to hang in my kitchen.